Python 基础库
记录了Python的网络请求实现与虚拟环境。
Python 网络请求
这里使用
Python的第三方库requests实现网络请求。
requests有以下功能特性,几乎涵盖了当今web服务的需求,例:
- 浏览器式的
SSL验证;- 身份认证;
- 带持久
Cookie的会话;- 流下载;
- 文件分块上传;
HTTP 请求
HTTP 请求基本概念
一个HTTP请求由三部分构成:
- 请求行
- 请求头:
- 请求正文

requests 方法实践
Get 请求
发送 Get 请求的 API 为:
requests.get(url, params=None, **kwargs)使用 requests 发送 get 请求:
import requests
get_response1 = requests.get('https://api.github.com/events')部分情况下,URL 会携带参数,例如 https://segmentfault.com/blogs?page=2 ,这个 URL 有一个参数 page ,值为 2 ,requests 提供了 params 关键字参数,允许我们以字典的形式来提供这些参数:
import requests

request_obj = requests.get('https://segmentfault.com/blogs',params={'page':2,'age':None})
print(request_obj.url)
# 输出:https://segmentfault.com/blogs?page=2
# 注意:字典中为None的内容不会被添加到url上
Post 请求
发送 Post 请求的 API 为:
requests.post(url, data=None, json=None, **kwargs)使用 requests 发送 post 请求
import requests
request_obj = requests.post("http://httpbin.org/post")
通常,在发送 POST 请求时还会附上数据,比如发送编码为表单形式的数据或编码为 JSON 形式的数据,这时,我们可以使用 Requests 提供的 data 或 json 参数。
发送编码为表单形式的数据
import requests
payload = {'page': 1, 'per_page': 10}
request_obj = requests.post("http://httpbin.org/post", data=payload)
查看输出
>>> print(request_obj.text)
{
  "args": {},
  "data": "",
  "files": {},
  "form": {
    "page": "1",
    "per_page": "10"
  },
  "headers": {
    "Accept": "*/*",
    "Accept-Encoding": "gzip, deflate",
    "Content-Length": "18",
    "Content-Type": "application/x-www-form-urlencoded",
    "Host": "httpbin.org",
    "User-Agent": "python-requests/2.28.1",
    "X-Amzn-Trace-Id": "Root=1-62bd0db7-2705162709bce09a0ee24c31"
  },
  "json": null,
  "origin": "222.90.10.252",
  "url": "http://httpbin.org/post"
}
发送编码为 JSON 格式的数据
使用 data 参数也可发送 JSON 格式的数据。
import json
import requests

payload = {'page': 1, 'per_page': 10}
requests_obj = requests.post("http://httpbin.org/post", data=json.dumps(payload))
查看输出结果:
>>> print(requests_obj.text)
{
  "args": {},
  "data": "{\"page\": 1, \"per_page\": 10}",
  "files": {},
  "form": {},
  "headers": {
    "Accept": "*/*",
    "Accept-Encoding": "gzip, deflate",
    "Content-Length": "27",
    "Host": "httpbin.org",
    "User-Agent": "python-requests/2.28.1",
    "X-Amzn-Trace-Id": "Root=1-62bd0e89-0bd2b1a02b9fcf7a40d8f479"
  },
  "json": {
    "page": 1,
    "per_page": 10
  },
  "origin": "222.90.10.252",
  "url": "http://httpbin.org/post"
}
使用 data 参数传递编码为 JSON 格式的数据,需要对dict编码,等价于下面使用 json 参数直接传递 dict 的方式:
import requests
payload = {'page': 1, 'per_page': 10}
requests_obj = requests.post("http://httpbin.org/post", json=payload)
查看结果输出:
>>> print(requests_obj.text)
{
  "args": {},
  "data": "{\"page\": 1, \"per_page\": 10}",
  "files": {},
  "form": {},
  "headers": {
    "Accept": "*/*",
    "Accept-Encoding": "gzip, deflate",
    "Content-Length": "27",
    "Content-Type": "application/json",
    "Host": "httpbin.org",
    "User-Agent": "python-requests/2.28.1",
    "X-Amzn-Trace-Id": "Root=1-62bd0f43-197076e340098e371a43fc3c"
  },
  "json": {
    "page": 1,
    "per_page": 10
  },
  "origin": "222.90.10.252",
  "url": "http://httpbin.org/post"
}
请求头
一些 Http 请求需要构造请求头,可以使用 dict 给 headers 传递参数实现,如下:
import requests

url = 'http://httpbin.org/post'
payload = {'page': 1, 'per_page': 10}
headers = {'User-Agent': 'Mozilla/4.0 (compatible; MSIE 5.5; Windows NT)'}

requests_obj = requests.post("http://httpbin.org/post", json=payload, headers=headers)
print(requests_obj.request.headers)
发送到服务器的请求头可以使用 requests_obj.request.headers 来查看:
>>> print(requests_obj.request.headers)
{'User-Agent': 'Mozilla/4.0 (compatible; MSIE 5.5; Windows NT)', 'Accept-Encoding': 'gzip, deflate', 'Accept': '*/*', 'Connection': 'keep-alive', 'Content-Length': '27', 'Content-Type': 'application/json'}
服务器返回的请求头可以使用 requests_obj.headers 来查看:
>>> print(requests_obj.headers)
{'Date': 'Thu, 30 Jun 2022 02:55:34 GMT', 'Content-Type': 'application/json', 'Content-Length': '531', 'Connection': 'close', 'Server': 'gunicorn/19.9.0', 'Access-Control-Allow-Origin': '*', 'Access-Control-Allow-Credentials': 'true'}
Cookies
部分 url 需要携带 cookies 请求,可使用 cookies 参数指定要携带的 cookies。
import requests

headers = {'User-Agent': 'Mozilla/4.0 (compatible; MSIE 5.5; Windows NT)'}
cookies = {'sessionid':'tzwwdk68z05vou6g6624g52adavood5a','UserName':'e3base','CurrentRole':'%E7%AE%A1%E7%90%86%E5%91%98','CurrentCluster':'JF_E3base410'}
data = {'database':''}
requests_obj = requests.post('http://172.18.231.99:28011/JF_E3base560/e3resource/list/databases/', headers=headers, cookies=cookies, json=data)

# 输出
>>>print(requests_obj.status_code)
>>>print(requests_obj.text)
200
{"message": "success", "code": 200, "data": {"databases": ["bdess8", "default", "doris_test", "expand", "fice13", "hihihi", "hive001", "hive_euansu_02", "hive_hbase_test", "hive_jiajc", "hiveeee", "hivetset", "huangzx_a", "hudi", "ice13", "iceberg", "iceberg_impala", "iceberg_yupb", "impala_test1", "jiajc", "klklklkl", "niuxl", "sensitive", "sice", "spark_iceberg", "sql_quality", "suwh_a", "suwh_pri", "test", "test0220426", "test20220425", "test20220426", "test20220509", "test20220510", "test202205102", "test202205103", "test2022042505", "test2022042603", "test2022042604", "test2022042607", "test2022042655", "test2022042660", "test2022052303", "test2022052304", "test2022052305", "test_euansu_hive", "testdb", "tpcds_bin_partitioned_orc_2", "tpcds_text_2", "tt_renjy06_db", "wanglei_hive", "weiqm", "weizy", "youky_hdfs", "youky_hive", "youky_zuhu2", "youyou", "yupb", "yupb002", "zhangxrtest"]}}
身份认证
基本身份认证
基本身份认证(HTTP Basic Auth)是使用账号密码进行的简单认证,requests 提供了 HTTPBasicAuth 实现基本身份认证。
import requests
from requests.auth import HTTPBasicAuth

headers = {'X-Requested-By': 'ambari'}
params = {'fields':'Clusters/desired_configs'}

requests_obj = requests.get('http://172.18.231.130:8080/api/v1/clusters/E3baseCluster?fields=Clusters/desired_configs', headers=headers, params=params, auth=HTTPBasicAuth('admin', 'admin'))

# 输出
>>>print(requests_obj.status_code)
>>>print(requests_obj.text)
200
{
  "href" : "http://172.18.231.130:8080/api/v1/clusters/E3baseCluster?fields=Clusters/desired_configs&fields=Clusters/desired_configs",
  "Clusters" : {
    "cluster_name" : "E3baseCluster",
    "desired_configs" : {
      "admin-properties" : {
        "tag" : "9c2a7808-dce6-477d-8dd8-00c8b1653e12",
        "version" : 6
      },
      ...
      "zookeeper-logsearch-conf" : {
        "tag" : "67ccad57-abbd-498b-bf4c-b161b098a32f",
        "version" : 1
      }
    }
  }
}
HTTP 响应
HTTP响应基本概念
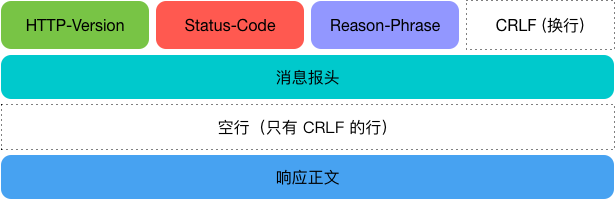
HTTP 响应与 HTTP 请求相似,由三部分组成:
- 状态行:
- 响应头:
- 响应正文
requests 方法实践
使用 requests.* 发送请求时, requests 做了以下两件事:
- 构建一个 requests 对象,该对象会根据请求方法或相关参数发起 HTTP 请求;
- 服务器返回响应时,会产生一个 response 对象,该响应对象包含服务器返回的所有信息,也包含原来创建的 requests 对象。
对于响应状态码,可以访问响应对象的 status_code 属性:
import requests

requests_obj = requests.get("http://httpbin.org/get")
print requests_obj.status_code

# 输出
200
对于响应正文,可以使用多种方式读取,例:
- 普通响应,使用
requests_obj.text获取; - JSON响应,使用
requests_obj.json()获取; - 二进制响应,使用
requests_obj.content获取; - 原始响应,使用
requests_obj.raw获取;
普通响应
使用 requests_obj.text 来读取 unicode 形式的响应,例:
import requests
requests_obj = requests.get("https://github.com/timeline.json")
# 输出
>>>print(requests_obj.text)
>>>print(requests_obj.encoding)
{"message":"Hello there, wayfaring stranger. If you’re reading this then you probably didn’t see our blog post a couple of years back announcing that this API would go away: http://git.io/17AROg Fear not, you should be able to get what you need from the shiny new Events API instead.","documentation_url":"https://docs.github.com/v3/activity/events/#list-public-events"}
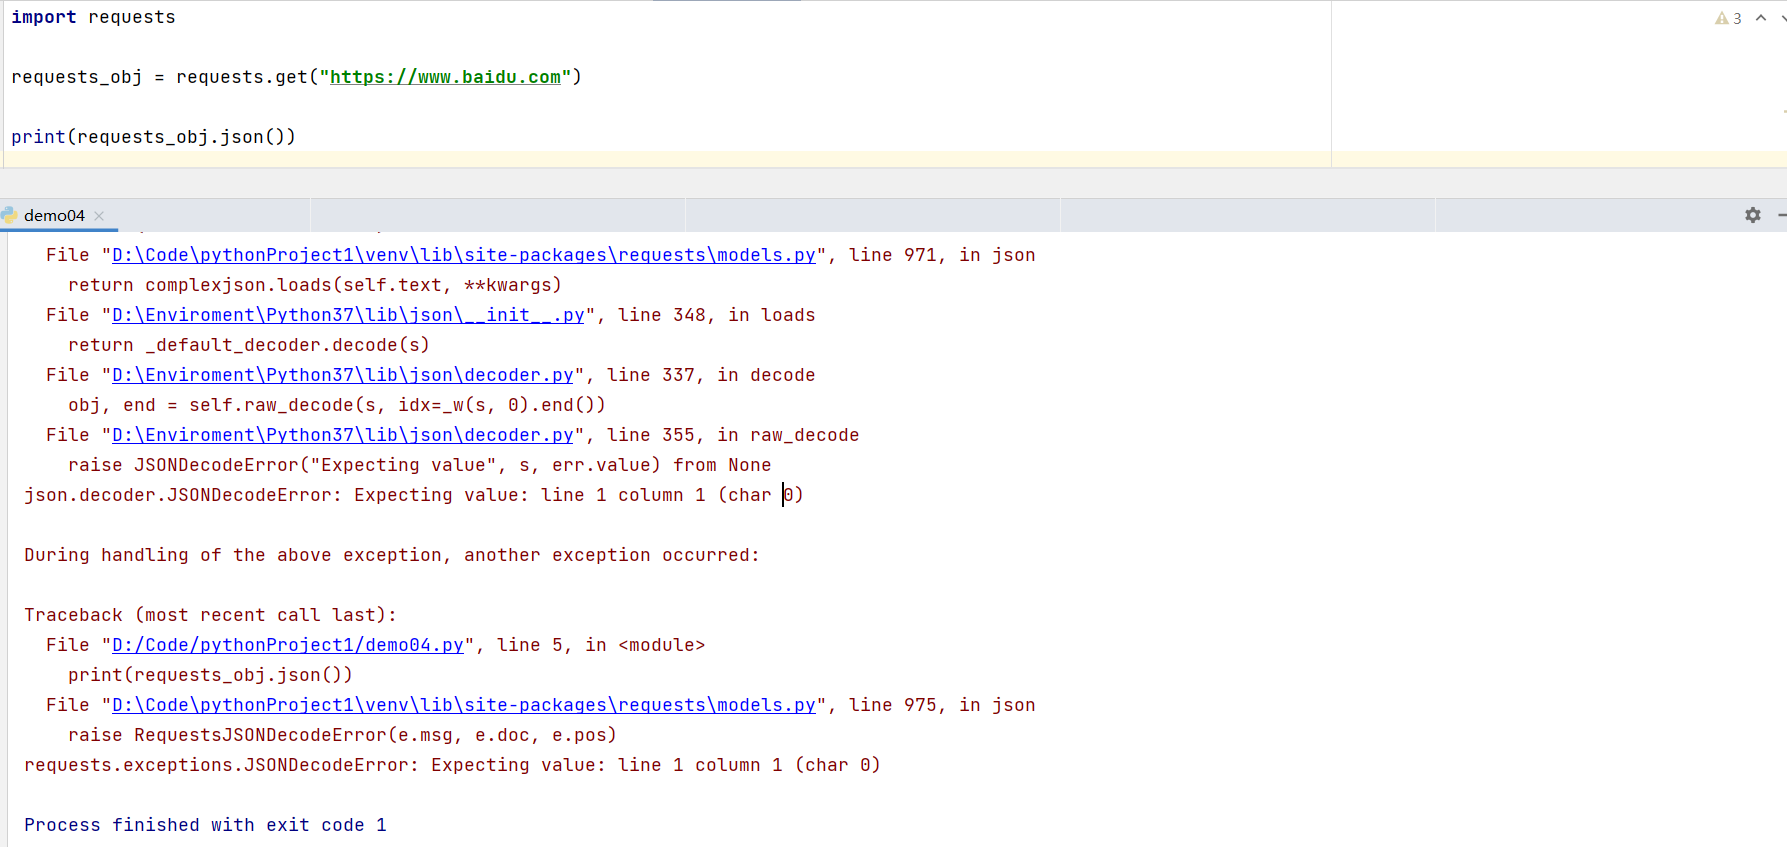
utf-8JSON 响应
对于 JSON 格式的响应,可以使用 json() 的方法把返回的数据解析成 Python 对象。
import requests
requests_obj = requests.get("https://github.com/timeline.json")

# 输出
>>>print(requests_obj.json())
{'message': 'Hello there, wayfaring stranger. If you’re reading this then you probably didn’t see our blog post a couple of years back announcing that this API would go away: http://git.io/17AROg Fear not, you should be able to get what you need from the shiny new Events API instead.', 'documentation_url': 'https://docs.github.com/v3/activity/events/#list-public-events'}
如响应的格式不是 JSON 格式,使用 json() 方法解析,会抛出错误。
二进制响应
使用 contenet 属性可以获取二进制数据,例如使用返回的二进制数据进行文件的传输:
import os
import requests

url = 'https://www.baidu.com/img/PCtm_d9c8750bed0b3c7d089fa7d55720d6cf.png'

requests_obj = requests.get(url)
image_data = requests_obj.content

with open('D:/study/Python/baidu.png', 'wb') as fout:
    fout.write(image_data)

filelist = os.listdir('D:/study/Python')

# 输出
>>>print(filelist)
['baidu.png', 'Python基础.assets', 'Python基础.md', 'Python高性能编程学习笔记.md', '[异步图书].Python高性能编程.pdf']
原始响应
获取响应的原始数据,可以通过 raw 属性实现,但在发送请求时需要设置 stream=True ,例如:
import requests

url = 'https://www.baidu.com/img/PCtm_d9c8750bed0b3c7d089fa7d55720d6cf.png'
requests_obj = requests.get(url,stream=True)

# 输出
# obj.read(size)
# size:要读取的字节数
>>>print(requests_obj.raw)
>>>print(requests_obj.raw.read(10))
<urllib3.response.HTTPResponse object at 0x000001DE74E461C8>
b'\x89PNG\r\n\x1a\n\x00\x00'
重定向
requests 会自动处理重定向的操作,可以使用 history 属性追踪请求 url 的重定向操作,requests_obj.history 是一个 response 对象的列表,这个列表按照从最开始的 url 到重定向的 url 进行排序。
import requests

headers = {'User-Agent': 'Mozilla/4.0 (compatible; MSIE 5.5; Windows NT)'}
requests_obj = requests.get('https://toutiao.io/k/c32y51',headers=headers)

# 输出
>>>print(requests_obj.status_code)
>>>print(requests_obj.history)
for response_obj in requests_obj.history:
    print(response_obj.url)

200
[<Response [302]>, <Response [301]>, <Response [302]>]
https://toutiao.io/k/c32y51
http://www.jianshu.com/p/490441391db6?hmsr=toutiao.io&utm_campaign=toutiao.io&utm_medium=toutiao.io&utm_source=toutiao.io
https://www.jianshu.com/p/490441391db6?hmsr=toutiao.io&utm_campaign=toutiao.io&utm_medium=toutiao.io&utm_source=toutiao.io
循环处理 requests_obj.history 可以追踪到 url 重定向后的 response 对象,打印 response.url 可以看到重定向的 url 。
如果请求方法是 GET、POST、PUT、OPTIONS、PATCH 或 DELETE,可以通过 all_redirects 参数禁止重定向:
import requests
headers = {'User-Agent': 'Mozilla/4.0 (compatible; MSIE 5.5; Windows NT)'}
requests_obj = requests.get('https://toutiao.io/k/c32y51',headers=headers,allow_redirects=False)

# 输出
>>>print(requests_obj.status_code)
>>>print(requests_obj.history)
302
[]
Virtualenv 虚拟环境
virtualenv 用来创建对立的 Python环境,可以将项目与实际的环境独立开,在这个环境中安装、卸载软件而不会影响到其他项目,解决了不同项目可能存在的依赖包版本的冲突问题。
安装 virtualenv
pip install -i https://pypi.mirrors.ustc.edu.cn/simple/ virtualenv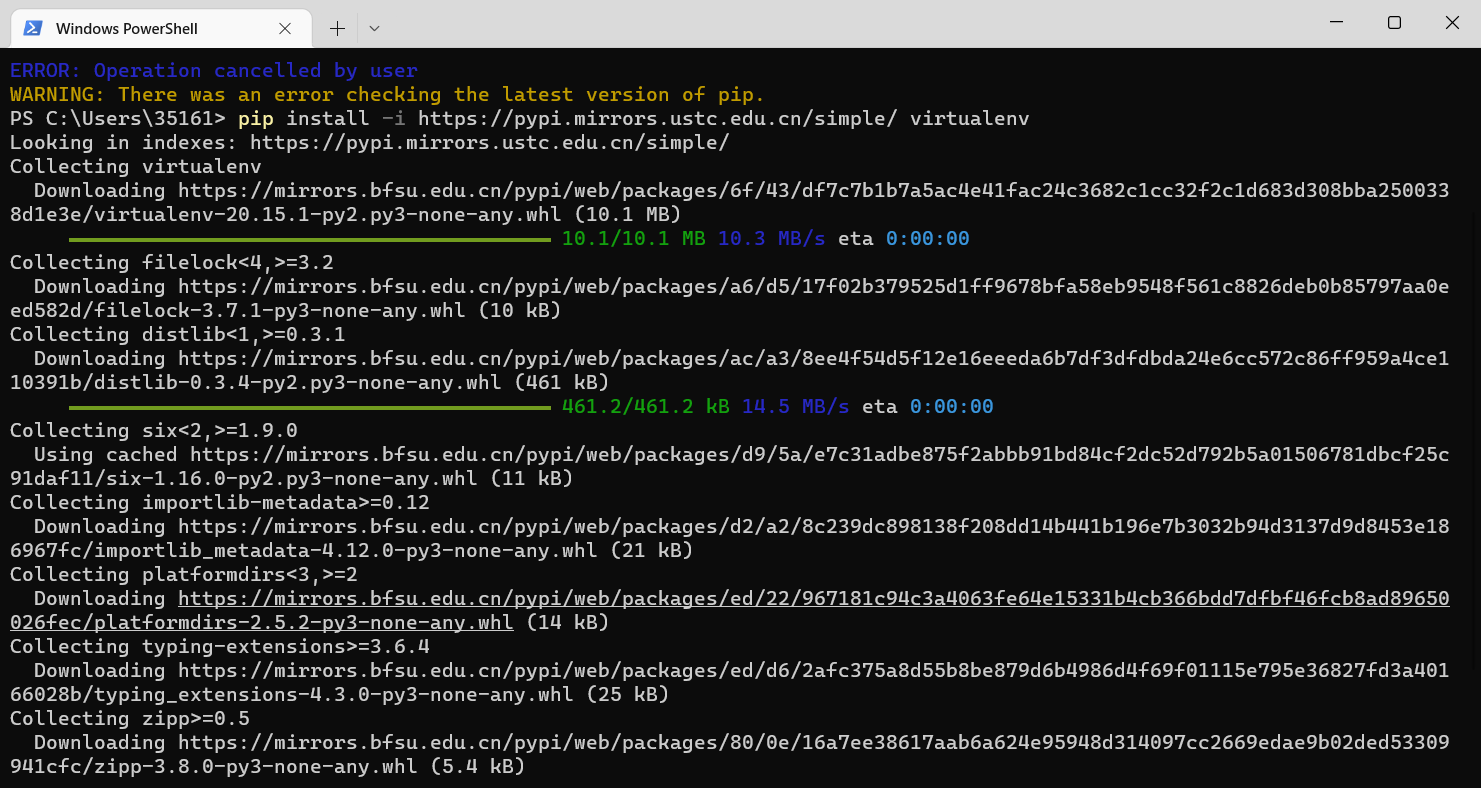
操作步骤
创建目录
# 创建目录
mkdir virtualEnv
# 进入创建的目录
cd virtualEnv
创建虚拟环境
virtualenv venv
激活虚拟环境
.\venv\Scripts\activate
激活虚拟环境后,会出现一个(venv)前缀,表明这是一个 Python 的 venv 虚拟环境。
在 venv 环境下,用 pip 安装的包都被安装到 venv 这个环境下,系统Python环境不受任何影响。也就是说,venv 环境是专门针对 virtualEnv 这个应用创建的。